The Battle of Mikatagahara, fought in December 1572 on the frozen plains of central Japan, stands as one of the most consequential military engagements of the Sengoku period. It was the day a young and ambitious Tokugawa Ieyasu met the overwhelming force of the legendary warlord Takeda Shingen—and was utterly crushed. This decisive Takeda victory, however, would paradoxically forge Ieyasu into one of history’s greatest rulers. Read on to discover the background, the audacious maneuvers, and how this humiliating defeat ultimately secured the alliance that would unify a nation.
The Battle of Mikatagahara (1572): When Tokugawa Ieyasu Faced His Greatest Defeat
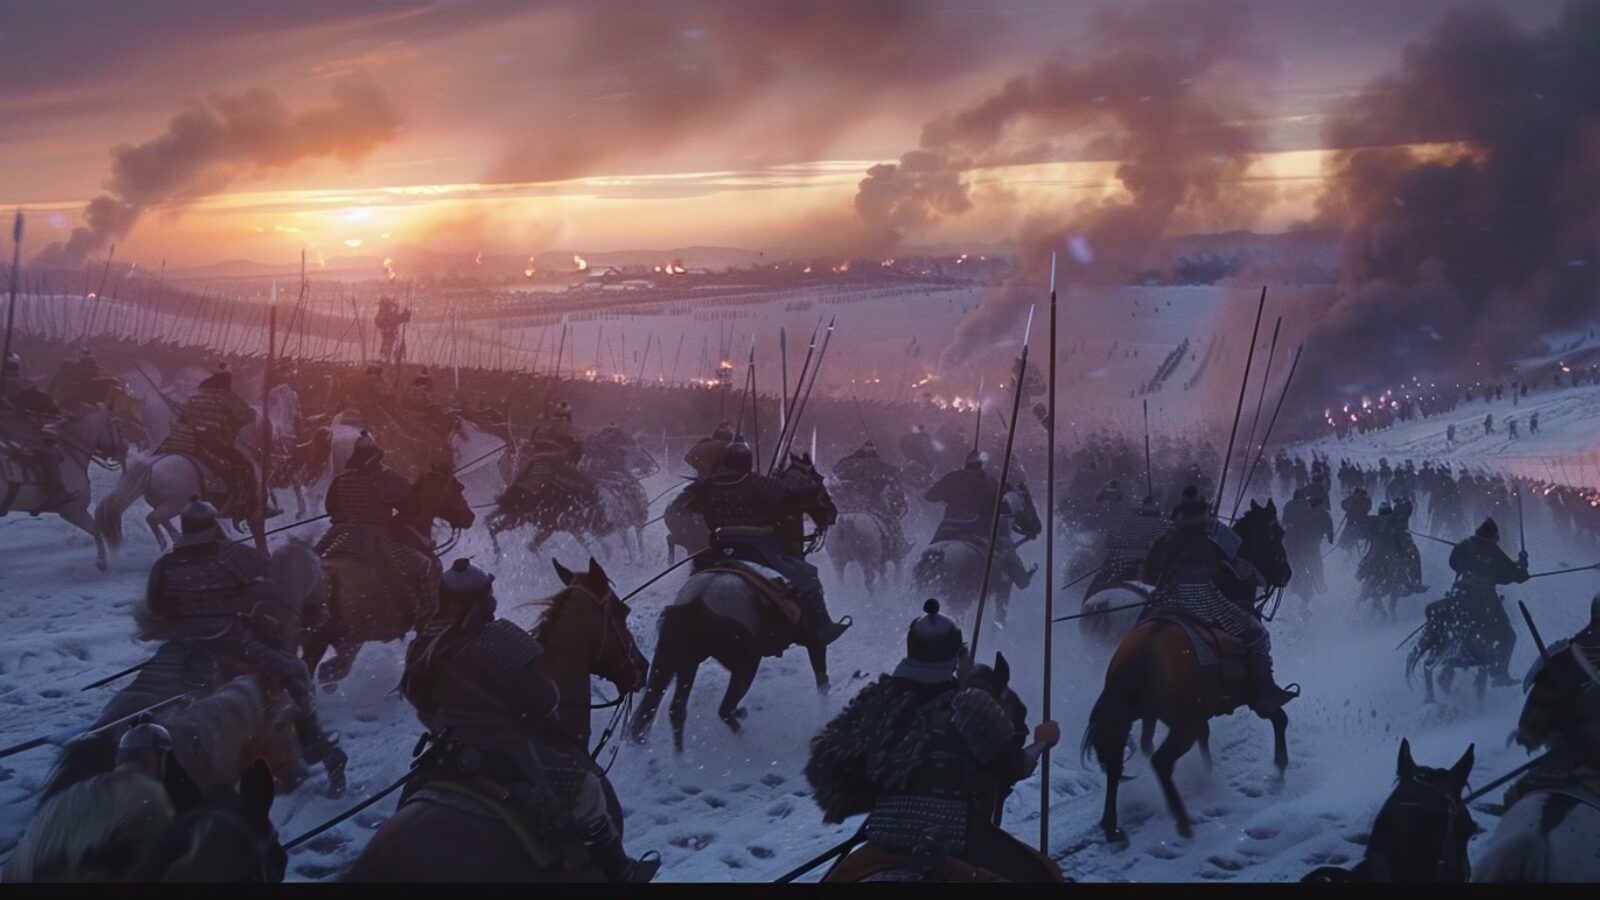
The Battle of Mikatagahara (三方ヶ原の戦い), fought in December 1572 on the frozen plains northwest of Hamamatsu, stands as one of the most consequential military engagements of Japan’s Sengoku period. It was the day a young and ambitious Tokugawa Ieyasu met the overwhelming force of the legendary warlord Takeda Shingen — and was utterly crushed. Yet paradoxically, it was a defeat that ultimately forged one of history’s greatest rulers.
For students of Japanese history, military strategists, and samurai enthusiasts alike, this battle offers a rare window into the brutal realities of Sengoku warfare: the audacity of a commander who marched out against impossible odds, the genius of a tactician who engineered a near-perfect envelopment, and the fragile alliance politics that shaped the destiny of a nation. Understanding Mikatagahara means understanding why Ieyasu reportedly kept a haunted portrait of himself — a reminder, for the rest of his life, never to repeat that mistake.
What Was the Battle of Mikatagahara?
The Battle of Mikatagahara was a decisive military engagement fought on the 22nd day of the 12th month of Genki 3 — January 25, 1573 in the Gregorian calendar — near present-day Hamamatsu City, Shizuoka Prefecture, Japan. The battle pitted the massive Takeda army — estimated at over 25,000 soldiers (estimates vary by source) under the command of Takeda Shingen — against a combined Tokugawa-Oda force of roughly 8,000–11,000 men (approx. 8,000 Tokugawa + 3,000 Oda reinforcements) led by Tokugawa Ieyasu. The result was a crushing Takeda victory, with the Tokugawa forces suffering catastrophic losses and Ieyasu himself barely escaping with his life back to Hamamatsu Castle.
The battle was part of Shingen’s bold Nishijō Sakusen (西上作戦) — the Western Advance Campaign — in which he marched his forces toward Kyoto with the aim of overthrowing Oda Nobunaga‘s supremacy and potentially installing a new shogunate. Mikatagahara was not the final destination; it was a brutal waypoint on a march that history would ultimately never complete.
To understand why Mikatagahara happened, one must appreciate the volatile political landscape of 1572 Japan.
Shingen’s terminal illness: By 1572, Takeda Shingen was already gravely ill. His western march was a race against time.
The Asakura-Azai resistance:Oda Nobunaga was locked in brutal warfare against the Asakura and Azai clans in the north, leaving his eastern flank exposed.
Shogun Ashikaga Yoshiaki’s plea: The 15th Ashikaga shogun secretly urged Shingen and other daimyo to form an anti-Nobunaga coalition.
Ieyasu’s precarious position:Tokugawa Ieyasu controlled Mikawa and Tōtōmi — territories directly in Shingen’s path. As Nobunaga’s ally, he had no choice but to resist.
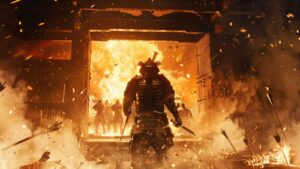
The fall of Futamata Castle: In late 1572, Shingen’s forces captured Futamata Castle, a key Tokugawa stronghold, leaving Hamamatsu itself exposed.
Oda’s limited reinforcement:Nobunaga sent approximately 3,000 troops including Hirate Hirohide (who would die in the battle) and Sakuma Nobumori — far too few to alter the balance of power.
The Course of the Battle — Timeline
Scene 1 — The Takeda Army Bypasses Hamamatsu
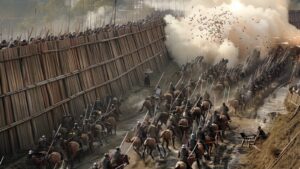
On the morning of January 25, 1573, the Takeda army began marching southwest across the Mikatagahara plateau. Rather than attacking Hamamatsu Castle directly, Shingen deliberately marched his army in plain view of the defenders — a calculated provocation designed to goad Ieyasu into the open.
Scene 2 — Ieyasu’s Fateful Decision to Sortie
Watching the Takeda columns march past, Ieyasu faced an agonizing choice. His retainers, including Honda Tadakatsu, counseled caution. However, allowing Shingen to march through Tokugawa territory unchallenged would be an unbearable humiliation. Driven by pride and political calculation, Ieyasu ordered his forces to sortie — roughly 11,000 men marched out onto the plateau.
Scene 3 — The Battle Formations
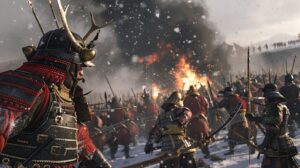
When the Takeda army turned to face the pursuing Tokugawa force, Shingen deployed his troops in the Gyorin (魚鱗, “Fish Scale”) formation — a concentrated offensive formation designed to pierce through the enemy center. The Tokugawa forces had deployed in the Kakuyoku (鶴翼, “Crane Wing”) formation, spreading their wings to attempt an envelopment. Yamagata Masakage commanded the Takeda left flank, and veteran general Baba Nobuharu held the right.
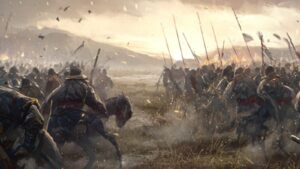
Scene 4 — The Rout
As dusk fell, the Takeda forces launched their assault. Outnumbered and outmaneuvered, the combined Tokugawa-Oda army disintegrated under the pressure. Honda Tadakatsu’s famous rearguard action is most often associated with the earlier Battle of Hitokotosaka; he also served in the retreat at Mikatagahara.Honda Tadakatsu helped Ieyasu escape. According to tradition, a retainer named Natsume Yoshinobu (also known as Hirotsugu) disguised himself as Ieyasu during the retreat to draw away pursuers, sacrificing his life. According to later tradition, Ieyasu had a portrait painted of his own frightened expression after the battle — a reminder he kept for the rest of his life never to repeat that reckless mistake.
Scene 5 — The Empty Castle Gambit
Back at Hamamatsu Castle, Ieyasu’s retainers threw open the castle gates, lit bonfires, and beat drums. Takeda scouts, suspicious of a trap, advised Shingen not to pursue into the castle. The ruse worked. Shingen halted the pursuit, and Ieyasu survived. Shingen died — likely of illness (exact location disputed) — in April 1573, never reaching Kyoto.
Why This Battle Matters Historically
1. The Crucible of Tokugawa Ieyasu
No single defeat shaped Tokugawa Ieyasu more profoundly than Mikatagahara. The humiliation of near-annihilation at age 31 instilled in him a lifelong philosophy of patience, caution, and strategic endurance — the very qualities that would allow him to outlast rivals and found the Tokugawa shogunate in 1603.
2. The Peak — and the Limit — of Takeda Power
Mikatagahara represents the zenith of Takeda Shingen‘s military career. Yet Shingen’s death just four months later revealed how fragile that power was. His successor Takeda Katsuyori led the clan to catastrophic defeat at Nagashino in 1575, proving that Takeda supremacy had rested on Shingen himself.
3. The Preservation of the Nobunaga-Ieyasu Alliance
Had Ieyasu been killed or surrendered at Mikatagahara, Oda Nobunaga‘s eastern flank would have collapsed entirely. Ieyasu’s survival preserved the alliance that would eventually produce the unified Japan of the Edo period. The battle’s true historical significance lies not in who won on the day, but in who survived.
Key Figures of the Battle
Takeda Side
Takeda Shingen (武田信玄) — Supreme commander; architect of the Western Advance Campaign.
Yamagata Masakage (山県昌景) — Left flank commander; one of the “Four Generals of Takeda,” famous for his red-armored cavalry.
Baba Nobuharu (馬場信春) — Right flank commander; veteran known as “Baba the Undying.”
Naitō Masatoyo (内藤昌豊) — One of the “Four Generals of Takeda” (Shi Meishin); participated in combat operations.
Tokugawa Side
Tokugawa Ieyasu (徳川家康) — Commander-in-chief; survived the defeat and drew lasting lessons from it.
Honda Tadakatsu (本多忠勝) — Ieyasu’s most celebrated general; served in the rearguard during the retreat.
Sakakibara Yasumasa (榊原康政) — One of the “Four Heavenly Kings” of the Tokugawa; fought and survived.
Natsume Yoshinobu (also known as Hirotsugu) (夏目吉信/広次) — Retainer who, according to tradition, sacrificed himself by impersonating Ieyasu during the retreat.
Oda Side (Reinforcement Force)
Hirate Hirohide (平手汎秀) — Led the Oda reinforcement column; killed in the battle.
Sakuma Nobumori (佐久間信盛) — Senior Oda general commanding part of the reinforcements; later criticized for withdrawing early in the engagement.
Final Thoughts
The Battle of Mikatagahara endures in Japanese historical memory not as a story of triumph, but as a story of survival and transformation. Takeda Shingen demonstrated tactical mastery that winter, delivering a defeat that should, by rights, have ended Tokugawa Ieyasu‘s career — or his life. Yet history had other plans.
Shingen’s death in April 1573 robbed the Takeda clan of its irreplaceable core, while Ieyasu’s near-death experience gave him something far more valuable than a victory: wisdom. For anyone seeking to understand the making of the Tokugawa shogunate — and the two and a half centuries of relative peace that followed — the plateau of Mikatagahara is as good a starting point as any.
La Bataille de Mikatagahara (1572) : La Plus Grande Défaite de Tokugawa Ieyasu
En décembre 1572 (ère Genki 3), sur le plateau de Mikatagahara au nord-ouest de la forteresse de Hamamatsu, se déroula l’une des batailles les plus décisives de la période Sengoku. La bataille de Mikatagahara vit le jeune Tokugawa Ieyasu affronter les forces de Takeda Shingen — et en sortir écrasé. Pourtant, paradoxalement, cette défaite allait forger l’un des plus grands dirigeants de l’histoire japonaise.
Qu’est-ce que la Bataille de Mikatagahara ?
La bataille fut livrée le 22e jour du 12e mois de Genki 3 — 25 janvier 1573 dans le calendrier grégorien — sur le plateau de Mikatagahara, à l’ouest de l’actuelle ville de Hamamatsu. Elle opposa l’immense armée Takeda (estimée à 25 000–30 000 soldats, selon les sources) à une force combinée Tokugawa-Oda d’environ 11 000 hommes (env. 8 000 Tokugawa + 3 000 renforts Oda) sous les ordres de Tokugawa Ieyasu. Le résultat fut une victoire écrasante des Takeda.
La maladie de Shingen : Déjà gravement malade, Takeda Shingen devait agir maintenant ou jamais.
La résistance Asakura-Azai :Oda Nobunaga était engagé au nord, laissant son flanc est exposé.
L’appel du shōgun Yoshiaki : Celui-ci avait secrètement formé une coalition anti-Nobunaga.
La position précaire d’Ieyasu :Tokugawa Ieyasu se trouvait directement sur la route de Shingen.
La chute de Futamata : La prise du château clé de Futamata laissait Hamamatsu exposée.
Les renforts limités d’Oda : Hirate Hirohide (tué au combat) et Sakuma Nobumori menaient environ 3 000 soldats — insuffisants pour changer l’issue.
Le Déroulement de la Bataille
Scène 1 — L’armée Takeda contourne Hamamatsu
Le 25 janvier 1573, Shingen fit défiler son armée devant Hamamatsu sans l’attaquer — une provocation calculée pour forcer Ieyasu à sortir.
Scène 2 — La décision d’Ieyasu de sortir
Poussé autant par l’orgueil que par le calcul politique, Ieyasu ordonna la sortie malgré l’avis contraire de ses conseillers, dont Honda Tadakatsu.
Scène 3 — Les formations de combat
Shingen déploya ses troupes en formation Gyorin (魚鱗, “écaille de poisson”) — une attaque concentrée sur le centre ennemi. Les Tokugawa avaient adopté la formation Kakuyoku (鶴翼, “aile de grue”) pour tenter un encerclement. Yamagata Masakage commandait le flanc gauche Takeda, Baba Nobuharu le flanc droit.
Scène 4 — La déroute
À la tombée du crépuscule, le Takeda lança l’assaut général. L’armée Tokugawa-Oda s’effondra. Honda Tadakatsu — déjà célèbre pour son arrière-garde à la bataille de Hitokotosaka — couvrit la retraite d’Ieyasu. Selon la tradition, un vassal nommé Natsume Yoshinobu (également connu sous le nom de Hirotsugu) se fit passer pour Ieyasu afin de distraire les poursuivants, sacrifiant sa vie. Selon une tradition postérieure, Ieyasu aurait fait peindre son propre visage apeuré après la bataille — un rappel conservé toute sa vie de ne plus jamais commettre cette erreur.
Scène 5 — La ruse du château vide et la mort de Shingen
De retour à Hamamatsu, les vassaux d’Ieyasu ouvrirent les portes, allumèrent des feux et battirent des tambours. Les éclaireurs Takeda, soupçonnant un piège, déconseillèrent l’assaut. La ruse réussit. Shingen mourut en avril 1573 (lieu exact disputé) sans jamais atteindre Kyōto.
Pourquoi Cette Bataille est Historiquement Importante
1. Le Creuset de Tokugawa Ieyasu
Cette défaite à 31 ans insuffla à Tokugawa Ieyasu sa philosophie de patience et d’endurance stratégique — les qualités qui lui permirent de fonder le shogunat Tokugawa en 1603.
2. L’Apogée et les Limites de la Puissance Takeda
Mikatagahara est le zénith de la carrière de Takeda Shingen. Sa mort quatre mois plus tard révéla la fragilité de ce pouvoir. Le clan fut anéanti à Nagashino en 1575.
3. La Préservation de l’Alliance Nobunaga-Ieyasu
La survie d’Ieyasu préserva l’alliance avec Nobunaga qui allait produire le Japon unifié de l’époque d’Edo.
Sakakibara Yasumasa (榊原康政) — Survécut à la bataille.
Natsume Yoshinobu / Hirotsugu (夏目吉信/広次) — Se sacrifia selon la tradition.
Camp Oda
Hirate Hirohide (平手汎秀) — Tué au combat.
Sakuma Nobumori (佐久間信盛) — Critiqué pour son retrait précoce.
Conclusion
La bataille de Mikatagahara demeure une histoire de survie et de transformation. Takeda Shingen fit preuve d’une maîtrise tactique absolue, mais Ieyasu survécut et en tira la sagesse qui lui permit de bâtir l’une des dynasties les plus durables de l’histoire japonaise.
Die Schlacht von Mikatagahara (1572): Tokugawa Ieyasus größte Niederlage
Im Dezember 1572 (Genki 3), auf dem Plateau von Mikatagahara nordwestlich von Burg Hamamatsu, fand eine der bedeutendsten Schlachten der japanischen Sengoku-Zeit statt. Die Schlacht von Mikatagahara (三方ヶ原の戦い) sah den jungen Tokugawa Ieyasu gegen die überwältigende Streitmacht von Takeda Shingen antreten — und vernichtend unterliegen. Diese Niederlage jedoch sollte einen der größten Herrscher Japans formen.
Was war die Schlacht von Mikatagahara?
Die Schlacht wurde am 22. Tag des 12. Monats, Genki 3 — dem 25. Januar 1573 im gregorianischen Kalender — auf dem Plateau von Mikatagahara, nordwestlich des heutigen Hamamatsu, ausgetragen. Das geschätzte Takeda-Heer (25 000–30 000 Mann, Schätzungen variieren) traf auf eine kombinierte Tokugawa-Oda-Streitmacht von etwa 11 000 Mann (ca. 8 000 Tokugawa + 3 000 Oda-Verstärkung) unter Tokugawa Ieyasu. Das Ergebnis war eine vernichtende Takeda-Niederlage.
Shingens todbringende Krankheit:Takeda Shingen war schwer krank — ein Wettlauf gegen die Zeit.
Der Widerstand von Asakura und Azai:Oda Nobunaga war im Norden gebunden, sein östlicher Flügel war exponiert.
Shogun Yoshiakis Aufruf: Eine geheime anti-Nobunaga-Koalition wurde gebildet.
Ieyasus gefährdete Position:Tokugawa Ieyasu lag direkt auf Shingens Marschweg.
Der Fall von Burg Futamata: Die Einnahme des Stützpunkts setzte Hamamatsu unmittelbarer Bedrohung aus.
Odas begrenzte Verstärkung: Hirate Hirohide (im Gefecht gefallen) und Sakuma Nobumori führten etwa 3 000 Soldaten — zu wenige, um die Lage zu ändern.
Der Verlauf der Schlacht
Szene 1 — Das Takeda-Heer umgeht Hamamatsu
Am 25. Januar 1573 marschierte das Takeda-Heer provokativ an Burg Hamamatsu vorbei, ohne sie anzugreifen — eine kalkulierte Herausforderung an Ieyasu.
Szene 2 — Ieyasus Entscheidung zum Ausfall
Trotz der Warnungen seiner Vasallen — darunter Honda Tadakatsu — befahl Ieyasu den Ausfall: Stolz und politisches Kalkül überwogen die militärische Vernunft.
Szene 3 — Die Schlachtaufstellungen
Shingen entfaltete das Takeda-Heer in der Gyorin-Formation (魚鱗, „Fischschuppe”) — eine konzentrierte Offensive auf das feindliche Zentrum. Die Tokugawa hatten die Kakuyoku-Formation (鶴翼, „Kranichflügel”) eingenommen, um eine Einkreisung zu versuchen. Yamagata Masakage befehligte den linken Takeda-Flügel, Baba Nobuharu den rechten.
Szene 4 — Die Auflösung
Bei Einbruch der Dämmerung eröffneten die Takeda ihren Angriff. Das Tokugawa-Oda-Heer brach zusammen. Honda Tadakatsu — bereits berühmt durch seine Nachhut bei der Schlacht von Hitokotosaka — sicherte erneut den Rückzug Ieyasus. Der Überlieferung nach verkleidete sich der Vasall Natsume Yoshinobu (auch bekannt als Hirotsugu) als Ieyasu, um die Verfolger abzulenken, und opferte dabei sein Leben. Einer späteren Überlieferung zufolge ließ Ieyasu sein eigenes erschrockenes Gesicht nach der Schlacht malen — ein Mahnmal, das er sein ganzes Leben bewahrte.
Szene 5 — Die List der leeren Burg und Shingens Tod
Zurück in Hamamatsu öffneten die Vasallen die Tore und schlugen Trommeln. Takeda-Kundschafter rieten vom Angriff ab. Die List glückte, und Ieyasu überlebte. Shingen starb im April 1573 (genaue Umstände umstritten), ohne Kyōto je erreicht zu haben.
Warum diese Schlacht historisch bedeutsam ist
1. Der Schmelztiegel des Tokugawa Ieyasu
Diese Niederlage mit 31 Jahren pflanzte in Tokugawa Ieyasu eine Philosophie der Geduld und strategischen Ausdauer, die ihm erlaubte, 1603 das Tokugawa-Shogunat zu gründen.
2. Der Höhepunkt und die Grenzen der Takeda-Macht
Mikatagahara markiert den Zenit von Takeda Shingens Laufbahn. Sein Tod vier Monate später und die Vernichtung bei Nagashino 1575 zeigten, wie sehr die Takeda-Stärke von seiner Person abhängig war.
3. Die Bewahrung des Bündnisses Nobunaga-Ieyasu
Ieyasus Überleben bewahrte das Bündnis mit Nobunaga, das schließlich das geeinte Japan der Edo-Zeit hervorbrachte.
Sakakibara Yasumasa (榊原康政) — Überlebte die Schlacht.
Natsume Yoshinobu / Hirotsugu (夏目吉信/広次) — Opferte sich der Überlieferung nach.
Oda-Seite
Hirate Hirohide (平手汎秀) — Im Gefecht gefallen.
Sakuma Nobumori (佐久間信盛) — Wegen frühem Rückzug später kritisiert.
Fazit
Die Schlacht von Mikatagahara ist eine Geschichte des Überlebens und der Verwandlung. Takeda Shingen bewies taktische Meisterschaft, doch Ieyasu überlebte und gewann dadurch etwas Wertvolleres als einen Sieg: Weisheit. Ohne diese Niederlage hätte es möglicherweise nie das über zwei Jahrhunderte andauernde Tokugawa-Shogunat gegeben.
Yanorisu
history fan
Nice to meet you! I am Yanorisu, a Japanese guy who loves history.


comment